Hands-on Tutorial for Data Owners
Overview
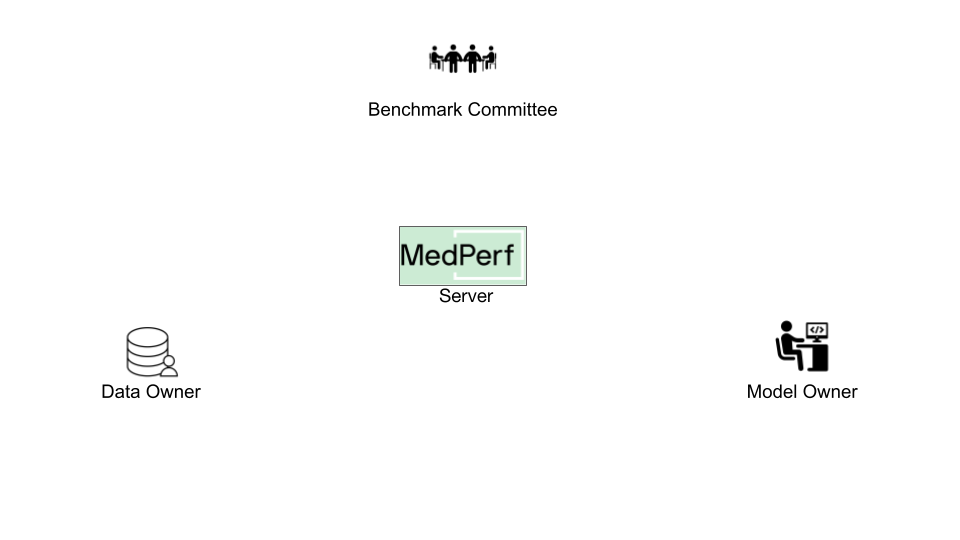
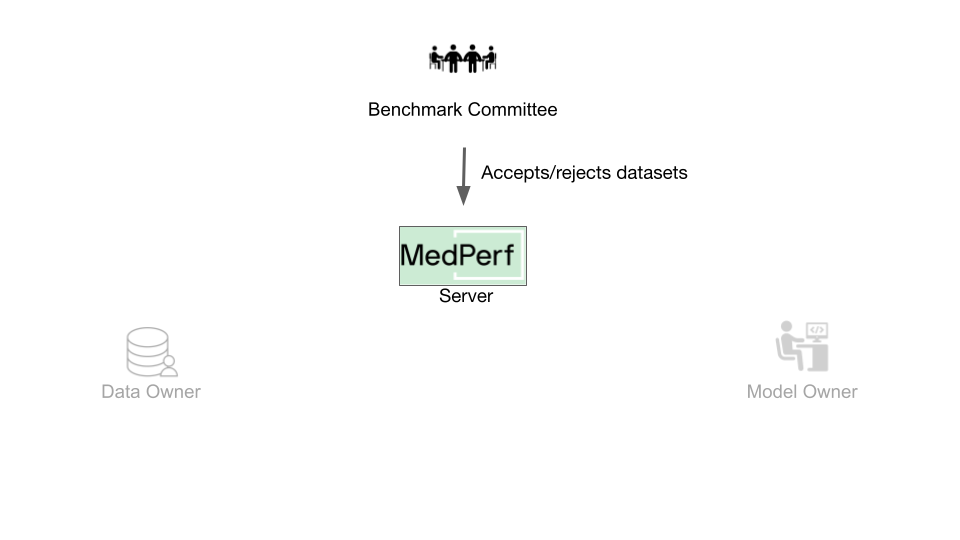
As a data owner, you plan to run a benchmark on your own dataset. Using MedPerf, you will prepare your (raw) dataset and submit information about it to the MedPerf server. You may have to consult the benchmark committee to make sure that your raw dataset aligns with the benchmark's expected input format.
Note
A key concept of MedPerf is the stringent confidentiality of your data. It remains exclusively on your machine. Only minimal information about your dataset, such as the hash of its contents, is submitted. Once your Dataset is submitted and associated with a benchmark, you can run all benchmark models on your data within your own infrastructure and see the results / predictions.
This guide provides you with the necessary steps to use MedPerf as a Data Owner. The key tasks can be summarized as follows:
- Register your data information.
- Prepare your data.
- Mark your data as operational.
- Request participation in a benchmark.
- Execute the benchmark models on your dataset.
- Submit a result.
It is assumed that you have the general testing environment set up.
Before You Start
First steps
Running in cloud via Github Codespaces
As the most easy way to play with the tutorials you can launch a preinstalled Codespace cloud environment for MedPerf by clicking this link:
![]()
Running in local environment
To start experimenting with MedPerf through this tutorial on your local machine, you need to start by following these quick steps:
Prepare the Local MedPerf Server
For the purpose of the tutorial, you have to initialize a local MedPerf server with a fresh database and then create the necessary entities that you will be interacting with. To do so, run the following: (make sure you are in MedPerf's root folder)
Download the Necessary files
A script is provided to download all the necessary files so that you follow the tutorial smoothly. Run the following: (make sure you are in MedPerf's root folder)
This will create a workspace folder medperf_tutorial where all necessary files are downloaded. The folder contains the following content:
Toy content description
Tutorial's Dataset Example
The medperf_tutorial/sample_raw_data/ folder contains your data for the specified Benchmark. In this tutorial, where the benchmark involves classifying chest X-Ray images, your data comprises:
images/folder contains your imageslabels/labels.csv, which provides the ground truth markup, specifying the class of each image.
The format of this data is dictated by the Benchmark Owner, as it must be compatible with the benchmark's Data Preparation container. In a real-world scenario, the expected data format would differ from this toy example. Refer to the Benchmark Owner to get a format specifications and details for your practical case.
As previously mentioned, your data itself never leaves your machine. During the dataset submission, only basic metadata is transferred, for which you will be prompted to confirm.
In real life all the listed artifacts and files have to be created on your own. However, for tutorial's sake you may use this toy data.
Login to the Local MedPerf Server
The local MedPerf server is pre-configured with a dummy local authentication system. Remember that when you are communicating with the real MedPerf server, you should follow the steps in this guide to login. For the tutorials, you should run the following:
You are now ready to start!
1. Register your Data Information
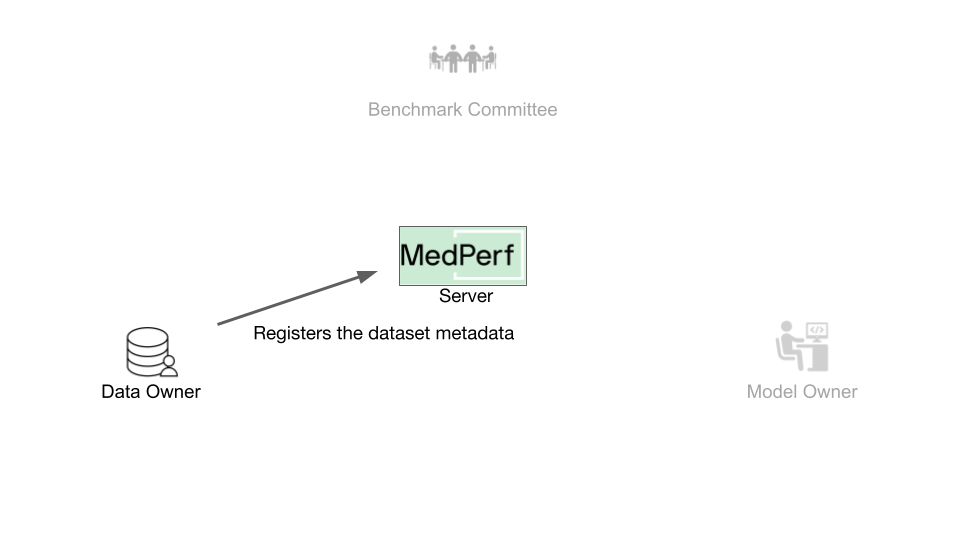 To register your dataset, you need to collect the following information:
- A name you wish to have for your dataset.
- A small description of the dataset.
- The source location of your data (e.g., hospital name).
- The path to the data records (here, it is
medperf_tutorial/sample_raw_data/images). - The path to the labels of the data (here, it is
medperf_tutorial/sample_raw_data/labels) - The benchmark ID that you wish to participate in. This ensures your data in the next step will be prepared using the benchmark's data preparation container.
Note
The data_path and labels_path are determined according to the input path requirements of the data preparation container. To ensure that your data is structured correctly, it is recommended to check with the Benchmark Committee for specific details or instructions.
In order to find the benchmark ID, you can execute the following command to view the list of available benchmarks.
The target benchmark ID here is 1.
Note
You will be submitting general information about the data, not the data itself. The data never leaves your machine.
Run the following command to register your data (make sure you are in MedPerf's root folder):
medperf dataset submit \
  --name "mytestdata" \
  --description "A tutorial dataset" \
  --location "My machine" \
  --data_path "medperf_tutorial/sample_raw_data/images" \
  --labels_path "medperf_tutorial/sample_raw_data/labels" \
  --benchmark 1
Once you run this command, the information to be submitted will be displayed on the screen and you will be asked to confirm your submission. Once you confirm, your dataset will be successfully registered!
2. Prepare your Data

To prepare and preprocess your dataset, you need to know the server UID of your registered dataset. You can check your datasets information by running:
In our tutorial, your dataset ID will be 1. Run the following command to prepare your dataset:
This command will also calculate statistics on your data; statistics defined by the benchmark owner. These will be submitted to the MedPerf server in the next step upon your approval.
3. Mark your Dataset as Operational
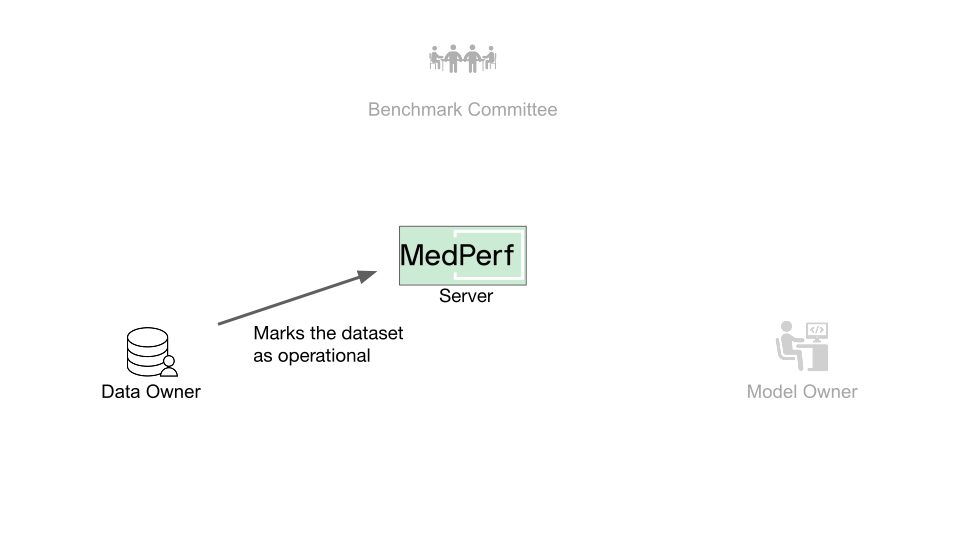
After successfully preparing your dataset, you can mark it as ready so that it can be associated with benchmarks you want. During preparation, your dataset is considered in the Development stage, and now you will mark it as operational.
Note
Once marked as operational, it can never be marked as in-development anymore.
Run the following command to mark your dataset as operational:
Once you run this command, you will see on your screen the updated information of your dataset along with the statistics mentioned in the previous step. You will be asked to confirm submission of the displayed information. Once you confirm, your dataset will be successfully marked as operational!
Next, you can proceed to request participation in the benchmark by initiating an association request.
4. Request Participation
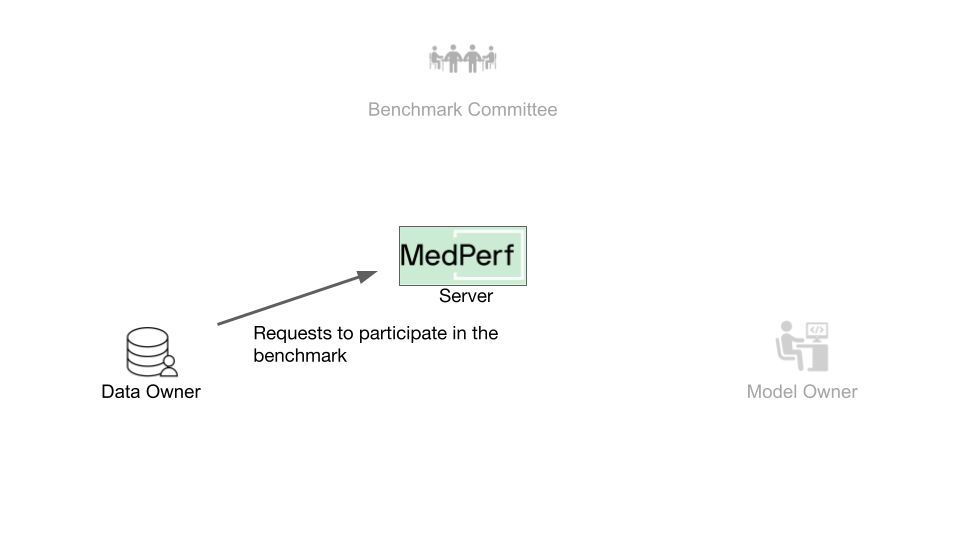 For submitting the results of executing the benchmark models on your data in the future, you must associate your data with the benchmark.
Once you have submitted your dataset to the MedPerf server, it will be assigned a server UID, which you can find by running medperf dataset ls --mine. Your dataset's server UID is also 1.
Run the following command to request associating your dataset with the benchmark:
This command will first run the benchmark's reference model on your dataset to ensure your dataset is compatible with the benchmark workflow. Then, the association request information is printed on the screen, which includes an executive summary of the test mentioned. You will be prompted to confirm sending this information and initiating this association request.
How to proceed after requesting association
 When participating with a real benchmark, you must wait for the Benchmark Committee to approve the association request. You can check the status of your association requests by running
 medperf association ls -bd. The association is identified by the server UIDs of your dataset and the benchmark with which you are requesting association.
For the sake of continuing the tutorial only, run the following to simulate the benchmark committee approving your association (make sure you are in the MedPerf's root directory):
You can verify if your association request has been approved by running medperf association ls -bd.
5. Execute the Benchmark
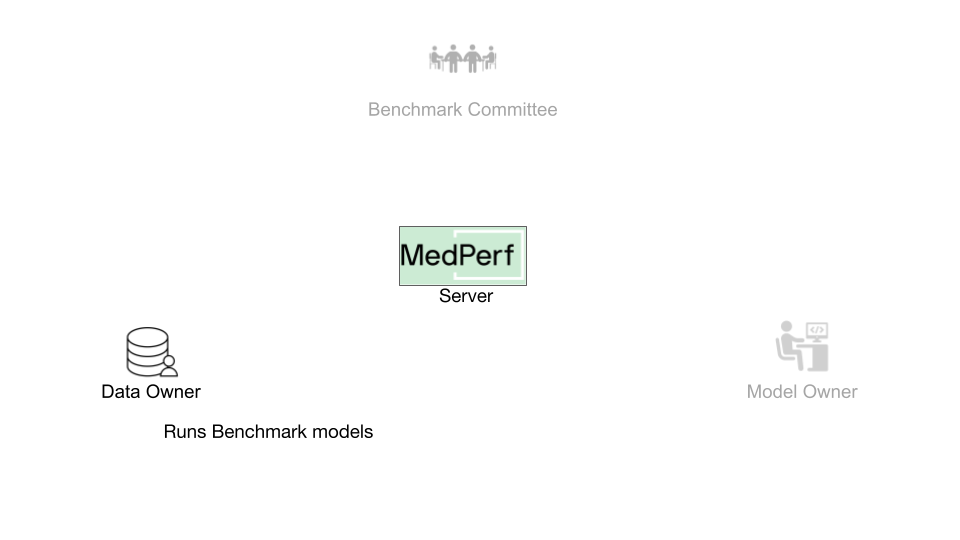 MedPerf provides a command that runs all the models of a benchmark effortlessly. You only need to provide two parameters:
- The benchmark ID you want to run, which is
1. - The server UID of your data, which is
1.
For that, run the following command:
After running the command, you will receive a summary of the executions. You will see something similar to the following:
  model    Execution UID  partial result    from cache    error
-------  ---------------  ----------------  ------------  -------
      2                2  False             False
      1                1  False             True
Total number of models: 2
        1 were skipped (already executed), of which 0 have partial results
        0 failed
        1 ran successfully, of which 0 have partial results

✅ Done!
This means that the benchmark has two models:
- A model that you already ran when you requested the association. This explains why it was skipped.
- Another model that ran successfully. Its result UID is
2.
You can view the results by running the following command with the specific result UID. For example:
For now, your results are only local. Next, you will learn how to submit the results.
6. Submit a Result
 After executing the benchmark, you will submit the results to the MedPerf server. To do so, you have to find the target result ID.
As an example, you will be submitting the result of UID 2. To do this, run the following command:
The information that is going to be submitted will be printed to the screen and you will be prompted to confirm that you want to submit.
Cleanup (Optional)
You have reached the end of the tutorial! If you are planning to rerun any of the tutorials, don't forget to cleanup:
-
To shut down the local MedPerf server: press
CTRL+Cin the terminal where the server is running. -
To cleanup the downloaded files workspace (make sure you are in the MedPerf's root directory):
- To cleanup the local MedPerf server database: (make sure you are in the MedPerf's root directory)
- To cleanup the test storage: