Hands-on Tutorial for Model Owners
Overview
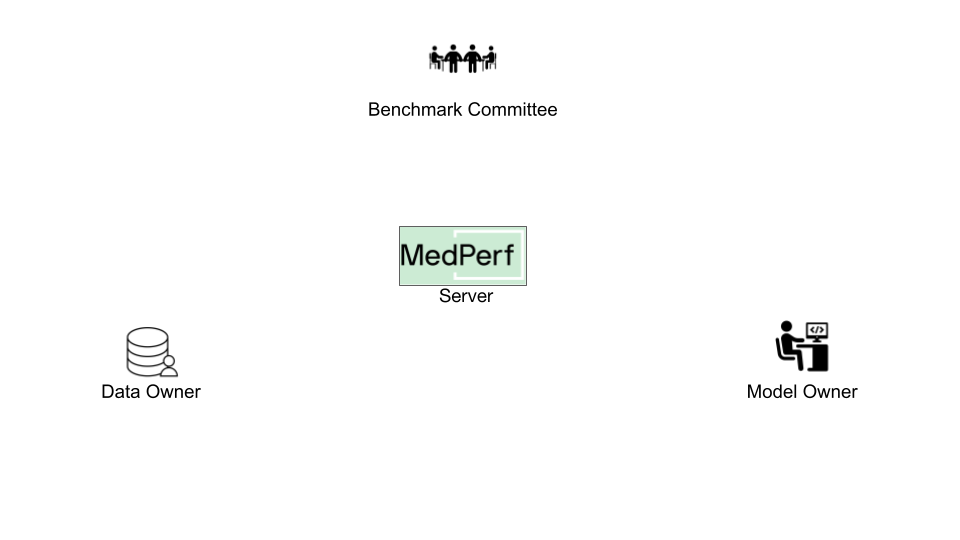
In this guide, you will learn how a Model Owner can use MedPerf to take part in a benchmark. Usually as a model owner you may be also interested in how to build a MedPerf-compatible model container. But this guide provides an already implemented container if you want to directly proceed to learn how to interact with MedPerf.
The main tasks of this guide are:
- A few notes about your model compatibility
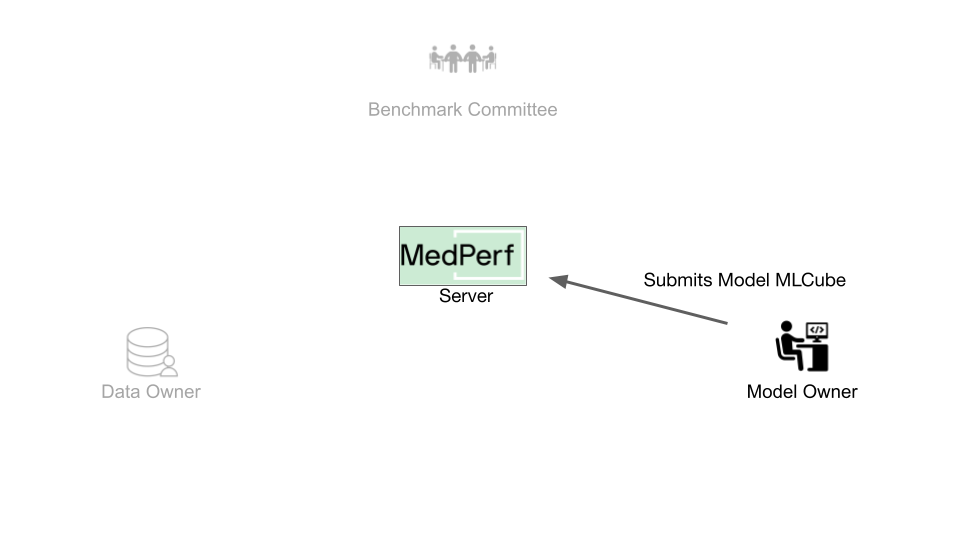
- Submitting the model.
- Requesting participation in a benchmark.
It's assumed that you have already set up the general testing environment as explained in the setup guide.
Before You Start
First steps
Running in cloud via Github Codespaces
As the most easy way to play with the tutorials you can launch a preinstalled Codespace cloud environment for MedPerf by clicking this link:
![]()
Running in local environment
To start experimenting with MedPerf through this tutorial on your local machine, you need to start by following these quick steps:
Prepare the Local MedPerf Server
For the purpose of the tutorial, you have to initialize a local MedPerf server with a fresh database and then create the necessary entities that you will be interacting with. To do so, run the following: (make sure you are in MedPerf's root folder)
Download the Necessary files
A script is provided to download all the necessary files so that you follow the tutorial smoothly. Run the following: (make sure you are in MedPerf's root folder)
This will create a workspace folder medperf_tutorial where all necessary files are downloaded. The folder contains the following content:
Toy content description
Model MLCube
The medperf_tutorial/model_mobilenetv2/ is a toy Model container. Once you submit your model to the benchmark, all participating Data Owners would be able to run the model within the benchmark pipeline. Therefore, your model container must support the specific input/output formats defined by the Benchmark Owners.
For the purposes of this tutorial, you will work with a pre-prepared toy benchmark. In a real-world scenario, you should refer to your Benchmark Owner to get a format specifications and details for your practical case.
In real life all the listed artifacts and files have to be created on your own. However, for tutorial's sake you may use this toy data.
Login to the Local MedPerf Server
The local MedPerf server is pre-configured with a dummy local authentication system. Remember that when you are communicating with the real MedPerf server, you should follow the steps in this guide to login. For the tutorials, you should run the following:
You are now ready to start!
1. Check your Implementation
Make sure your model container is compatible with the benchmark workflow in two main ways:
- It should expect a specific data input structure
- Its outputs should follow a particular structure expected by the benchmark's metrics evaluator container
These details should usually be acquired by contacting the Benchmark Committee and following their instructions.
2. Submit the Model
How does MedPerf Recognize an Container?
The MedPerf server registers a container as metadata comprised of a set of components that can be retrieved from the internet. This means that before submitting a container you have to host its components on the internet. You can refer to this page if you want to understand what the components are.
Host the Files
For the tutorial to run smoothly, the components are already hosted. If you wish to host them by yourself, you can find the list of supported options and details about hosting files in this page.
Submit the Model
The submission should include the URLs of the hosted files and the paths to the configuration files. For the model provided for the tutorial:
- The path to the container configuration file is
- The path to the parameters file is
- The URL to the hosted additional files tarball file is
Use the following command to submit:
medperf model submit \
   --name my-model \
   --container-config-file "medperf_tutorial/model_mobilenetv2/container_config.yaml" \
   --parameters-file "medperf_tutorial/model_mobilenetv2/workspace/parameters.yaml" \
   --additional-file "https://storage.googleapis.com/medperf-storage/chestxray_tutorial/mobilenetv2_weights.tar.gz" \
   --operational
The model will be assigned by a server UID. You can check it by running:
3. Request Participation
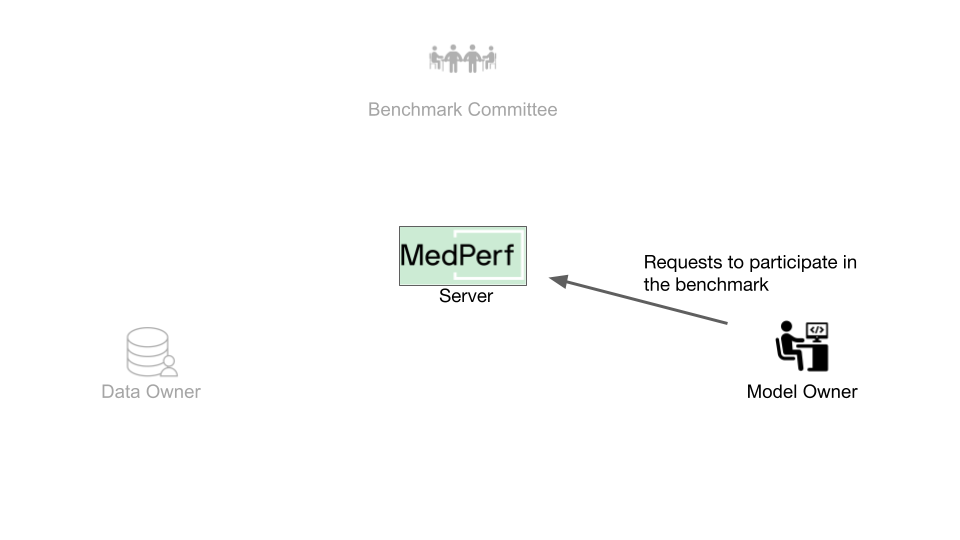 Benchmark workflows are run by Data Owners, who will get notified when a new model is added to a benchmark. You must request the association for your model to be part of the benchmark.
To initiate an association request, you need to collect the following information:
- The target benchmark ID, which is
1 - The server UID of your model, which is
2.
Run the following command to request associating your model with the benchmark:
This command will first run the benchmark's workflow on your model to ensure your model is compatible with the benchmark workflow. Then, the association request information is printed on the screen, which includes an executive summary of the test mentioned. You will be prompted to confirm sending this information and initiating this association request.
What Happens After Requesting the Association?
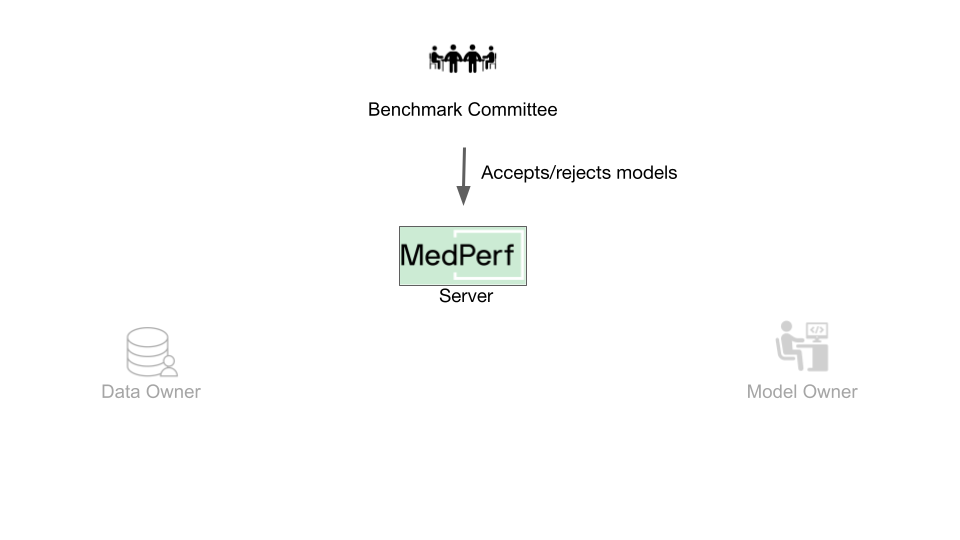 When participating with a real benchmark, you must wait for the Benchmark Committee to approve the association request. You can check the status of your association requests by running
 medperf association ls -bm. The association is identified by the server UIDs of your model and the benchmark with which you are requesting association.
Cleanup (Optional)
You have reached the end of the tutorial! If you are planning to rerun any of the tutorials, don't forget to cleanup:
-
To shut down the local MedPerf server: press
CTRL+Cin the terminal where the server is running. -
To cleanup the downloaded files workspace (make sure you are in the MedPerf's root directory):
- To cleanup the local MedPerf server database: (make sure you are in the MedPerf's root directory)
- To cleanup the test storage: